Ruby で CAS サーバを試す
仕組みはよくわからないのだけれども、 適当に作った自鯖上ウェブアプリケーション間でシングルサインオンをしたくなったので、 調べてみたら Ruby でサーバが建てられるみたいなので CAS とかいう仕組みを使うことにした。
んで、利用したのが、
ソースコードは github で公開されている。
特徴
- オープンソース。
- Ruby で実装されている。
- クライアントは何でも良い。
- Rails のプラグインとして利用可能。
- Rack インタフェースを持つ。
- Passenger で運用可能。
とりあえず試す。
インストール
gem からインストールする。
$ sudo gem install gunark-rubycas-server
Password:

For more information on RubyCAS-Server, see http://code.google.com/p/rubycas-server

If you plan on using RubyCAS-Server with languages other than English, please cd into the
RubyCAS-Server installation directory (where the gem is installed) and type `rake mo` to
build the LOCALE_LC files.

Successfully installed builder-2.1.2
Successfully installed markaby-0.5
Successfully installed picnic-0.8.1.20100201
Successfully installed gunark-rubycas-server-0.8.0.20090812
4 gems installed
設定
とりあえず一回起動すると /etc/rubycas-server/config.yml
というファイルが生成されるので、それをいじる。
$ sudo rubycas-server
$ sudo vim /etc/rubycas-server/config.yml
とりあえず動かすだけなので、行う設定は、
- ssl_cert の作成。
- データベースの設定。
- 認証方法の設定。
ssl_cert の作成
rake のタスクに、
- generate_key
- generate_ssl_certificate
というのがあるので、それを使っても良かったのだけれども、 テストに使うだけなら rubycas-server のプロジェクトページから、 テスト用の pem ファイルをダウンロードしてそれを使っても良いようだ。
ダウンロードしてきた pem ファイルを適当な場所に保存。今回は /etc/rubycas-server/ssl.pem として保存した。
設定ファイルをいじって保存した pem ファイルを使うように変更する。
$ sudo vim /etc/rubycas-server/config.yml
$ diff -u config.old.yml config.yml
--- config.example.yml  2010-04-07 17:10:24.000000000 +0900
+++ config.yml  2010-04-08 10:45:12.000000000 +0900
@@ -30,7 +30,7 @@

 server: webrick
 port: 443
-ssl_cert: /path/to/your/ssl.pem
+ssl_cert: /etc/rubycas-server/ssl.pem

 # If your private key is in a separate file from the cert
データベースの設定。
設定ファイルを見ると、mysql の casserver というデータベースを利用してるようなので、 作ってやる。
$ mysql5 -uroot
Welcome to the MySQL monitor.  Commands end with ; or \g.
Your MySQL connection id is 32
Server version: 5.1.45 Source distribution

Type 'help;' or '\h' for help. Type '\c' to clear the current input statement.

mysql> create database casserver default character set utf8;
Query OK, 1 row affected (0.65 sec)
認証方法の設定
rubycas-server がどうやって username/password を使って認証を行うのか設定をしてやる。
いくつか認証方法があって、
- データベースを作って、そこに username/password を保存する方法。
- ActiveDirectory を使う方法。
- LDAP を使う方法。
- Google のアカウントを使う方法。
- カスタムな認証方法。
Google のアカウントを使う方法が設定も簡単で面白そうなので、試してみることにした。
$ sudo vim /etc/rubycas-server/config.yml
$ diff -u config.old.yml config.yml
--- config.example.yml  2010-04-07 17:10:24.000000000 +0900
+++ config.yml  2010-04-08 10:45:12.000000000 +0900
@@ -262,8 +262,8 @@
 # would use to log in to Google services like Gmail). This authenticator
 # requires no special configuration -- just specify its class name:
 #
-#authenticator:
-#  class: CASServer::Authenticators::Google
+authenticator:
+ class: CASServer::Authenticators::Google
 #
 # Note that as with all authenticators, it is possible to use the Google
 # authenticator alongside other authenticators. For example, CAS can first
起動
これらの設定が終わったら、再度 rubycas-server を起動してみる。
$ sudo rubycas-server
認証サーバにブラウザで接続してみる。
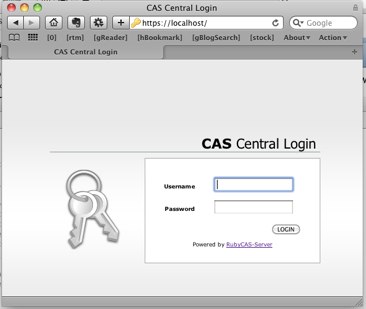
できたできた。
つぎは passenger で動かしてみたい。